Last updated on February 10th, 2023 at 07:57 am
macOS has the default time zone set to show the correct information on your MacBook but sometimes it can get stuck with the wrong time and may not show the right configuration for the local time, especially when you’re traveling. Thankfully, Apple offers an easy way to fix this. Here’s how you can change timezone on your MacBook.
How to change timezone on MacBook to make it display correct info
Time needed: 2 minutes
Your Mac uses its system clock to apply a date and time stamp to every file you create or edit, including the documents you save from your applications. So, if you’re stuck with the wrong time details, it can mess up with all the files you’ve saved or created. Let this problem not affect your work. Follow these steps to change timezone or correct it on MacBook, manually.
- Go to Date and Time settings
On your Mac, choose the Apple menu, select System Preferences from the list of options displayed and then, hit the Date & Time tile.

- Uncheck the Set time zone automatically option
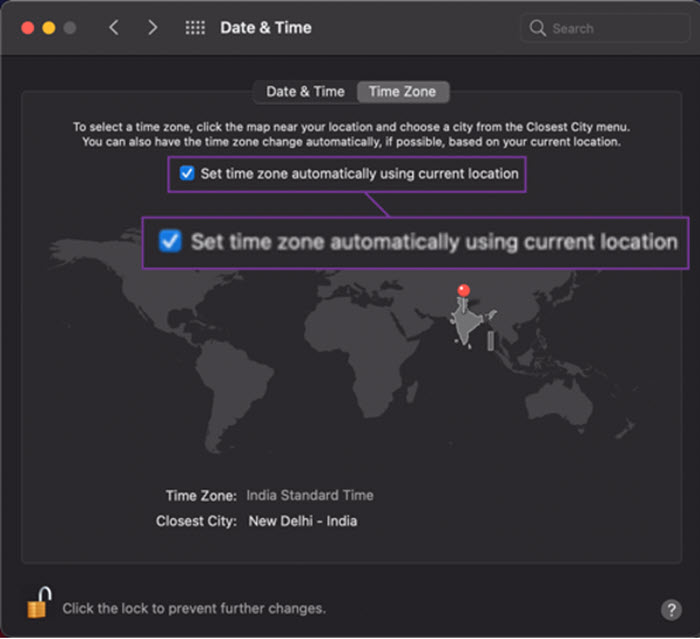
Expand the Date and Time settings. Switch to the Time Zone tab. Deselect the Set time zone automatically using current location option.
- Select a city or a place
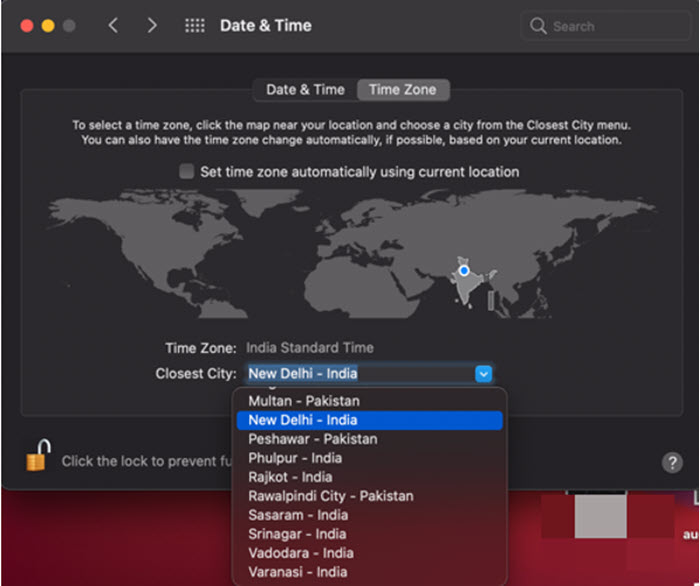
Choose a location on the map that is closest to your location and click the Closest Town/City drop-down button. At this step, you’ll be prompted to click the Lock icon to enter an administrator name and password. Do it!
- Switch to the Date & Time settings to change time
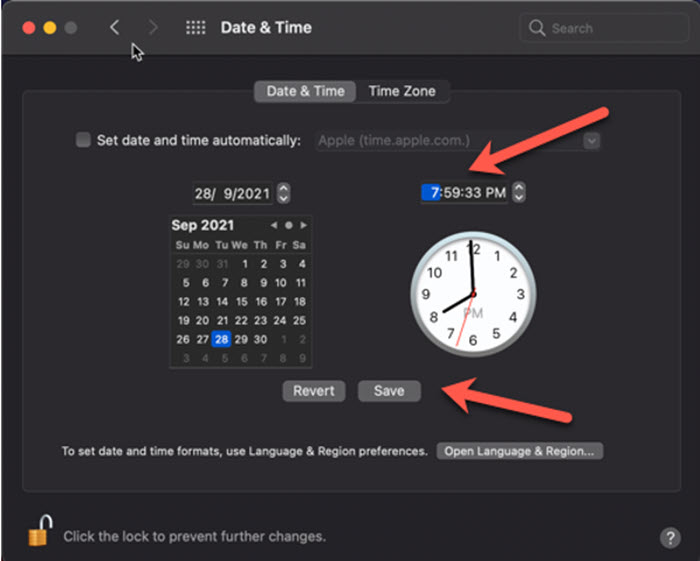
Switch to the Date & Time tab. Hit the drop-down button next to the clock to change the time. When done, save the changes and close the window.
Be sure your time is correct so time stamps on emails, messages, and files are correct.
Normally, macOS runs a ‘real-time clock’ that keeps track of the time & date entries. So, when you shut down the device, the clock continues to operate and keeps time accurately. When it fails to do so, you can correct it by following the instructions given in the post.


