Last updated on August 2nd, 2024 at 04:13 pm
How right-click on Mac can help you get the most out of your mouse is something you wouldn’t beg to differ about. Because, with it, you can readily bring up menus, perform actions like copying and pasting text in an instant, or save and delete files with just a click. In fact, you’ll notice that much of the user experience in macOS rests around this ubiquitous pointing device that fits cozily in the palm of your hand. So, if you’ve just moved into a new user experience (macOS), and aren’t sure how to enable this action, we’ll help you out!
How right-click on Mac can be enabled via System Settings
Regardless of how your system is worling, holding down the control key on your MacBook keyboard and tapping the primary mouse button gently will open a shortcut menu. It offerins a similar list of actions as seen in Windows. Still, if you would like to add this function directly with the built-in trackpad on your MacBook or a Magic Mouse, we’ll show you how. Just follow along.
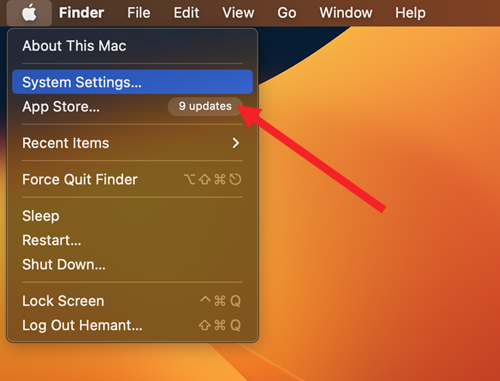
On your Mac, go to the Apple menu, located in the upper-left corner of your Desktop screen, and click it. From the list of options displayed select System Settings.

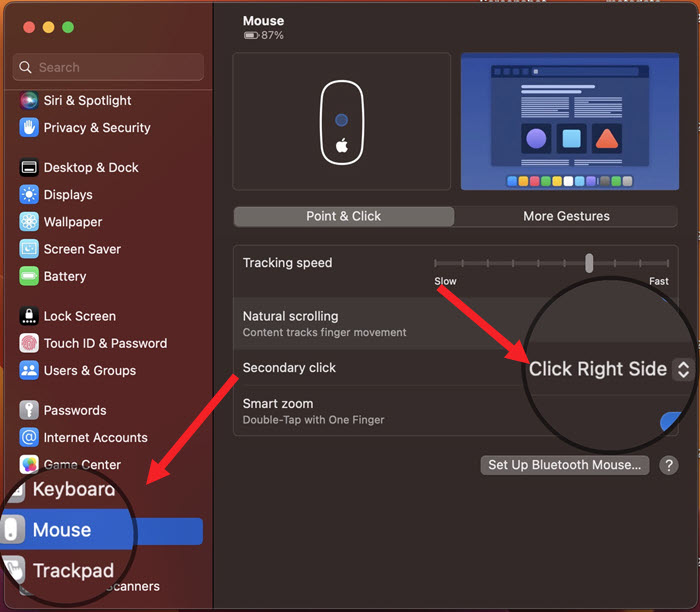
Navigate to the Mouse icon. Click open the mouse properties window and switch to the Point & Click tab to open the Point & Click pane.

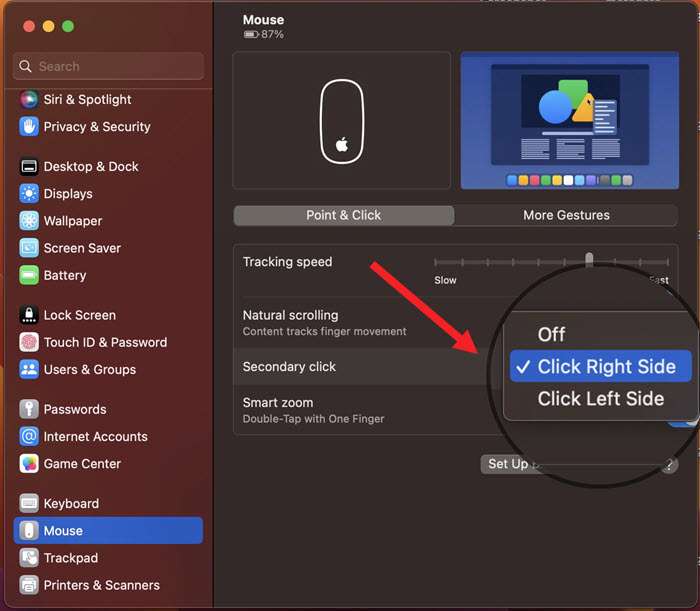
Scroll down to the Secondary click option. Hit the drop-down button, adjacent to it. From the options listed therein, select the desired option – Click on the right side (assigns the right-click function to the right side of your mouse. This is the default option). Alternatively, you can choose Click on the left side (assigns the right-click function to the left side of your mouse). Southpaws find this option more convenient).

Now, when you perform the right-click, the action will typically open the context menu. It will provide all operations pertaining to the menu, file name, or icon that you right-click. Apple also calls right-click for Mac as a secondary click.


