Last updated on August 7th, 2024 at 06:30 am
The Switch Control is an assistive technology that lets Apple users perform various actions just by clicking a switch. As such, its users can enter text, move pointer, select items, and do a lot more. Here’s a simple guide walking you through the process to enable Switch Control on MacBook and customize it to one’s preferences!
How to enable Switch Control on MacBook?
Switch Control is an Accessibility feature that intends to make the use of conventional hardware like keyboard key, mouse, trackpad button, joystick, or adaptive device for differently enabled people easier. Until now, interacting with these items on the screen had been a challenge for such people. To enable Switch Control do the following.
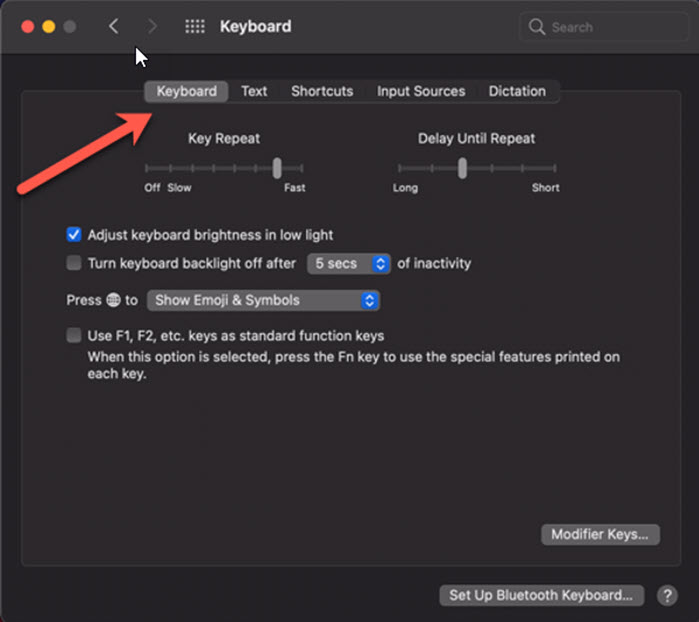
On your Mac, click the Apple menu and choose the System Preferences option.

Go to the Accessibility section. Switch to the General tab and from the left navigation bar, choose Switch Control. Next, check the box next to Enable Switch Control entry.

How to use the Switch Control Home Panel
To glance through and select items from the Home panel, press a switch (a mouse button or the Space bar) and press the switch for the second time to select the highlighted item. By default, the Space bar is used as a switch when the feature is enabled.
For setting panel options, wait until the Panel Options icon (visible as a gear) appear.

When seen, click the Select Item switch. Click the switch again when the option you would like to configure is highlighted.
Here, increase or decrease the size of the panel or increase or decrease its transparency, as desired.
To return to the Home panel, click the Select Item switch when the Home icon in the upper-right corner is highlighted. In the interface, press the switch when the Home panel is highlighted.
Set Panel options
The Switch Control Home Panel includes the following options,

- Keyboard – This displays or shows the default keyboard.
- Pointer – Provides buttons to move and click the pointer.
- App – Scans items and groups in the active window of the current app.
- Dock – Starts scanning the items in the Dock, immediately.
- Menu Bar – When configured, it scans the menu bar group first and the menu extras group, later.
- System – Alongside controlling the media playback, it controls the volume or display brightness of your Mac.
- Custom – Offers options to create custom panels in the Accessibility pane of System Preferences.
- Location – This option finds its utility in situations where you would like to reposition the Control Home panel on the screen.
It is important to mention here that if you have checked the Allow platform switching to control your computer box under the General preferences, you can also use your other devices to control your Mac.
Customize Switch Control on Mac
While you have the Control panel open, you can choose to customize the utility via 4 different tabs
- General
- Typing
- Switches
- Navigation
See what customization options these tabs have to offer.
1] General
It lets you modify the appearance of the Control Panel. You can choose to keep it dark or light. Just check the box next to the Appearance heading.

Similarly, you can force the panel to go into inactivity after a few seconds. Select the time frame by clicking the Up or Down arrow of the Hide panel after inactivity setting.
2] Typing
Typing tab lets you enable some additional typing features such as Automatic corrections and Text substitutions. You can easily configure them via Keyboard Preferences.
So, go to the Typing tab under Switch Control and hit the Keyboard Preferences button located at the bottom of the window. Adjust the options as desired!
3] Switches
The tab allows you to add or delete switches, assign actions, and do other things.
4] Navigation
Helps you configure options related to actions you can take while navigating. For example, what should be done when the pointer reaches the edge, set the cursor size, and others.
That’s All! Hope it helps!