Last updated on August 7th, 2024 at 06:42 am
Ever thought about turning your iPhone into a handy scanner without the fuss of downloading extra apps? Well, good news! The Notes app on your iPhone can do just that. It not only lets you swiftly capture paper documents but also conveniently backs them up to the cloud, making access a breeze across all your Apple devices. Let’s dive into a quick guide on how to scan documents using iPhone.
How to scan documents using iPhone?
Notes app in iOS allows users to scan files on iPhone and convert them into PDF format readily. So, in just a few simple steps, you can get a solidly scanned document, ready to be shared across multiple devices. Here’s how to do it!
Launch the Notes app on your iPhone. (You can use the app to create a new note directly in the Notes app. Alternatively, prompt Siri to start creating one for you). Tap the camera icon at the bottom of the app screen.

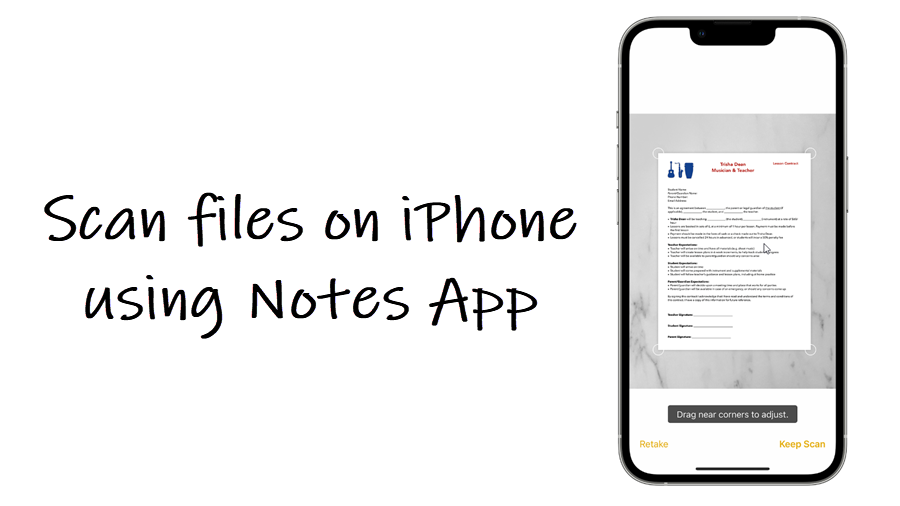
Position your document in the camera’s view. Here you can either use the auto-capture option by bringing your document into the viewfinder or use the shutter button to capture the positioned area.

Adjust the corners by dragging, if needed, and tap the Save button visible in the bottom right corner of your iPhone screen. Scan more pages if required.

By default, the options available are Color, Greyscale, Black & White and Photo. Choose the desired option.

Your scanned document will be ready. Tapping the Share button from within the scanned docs will allow you to markup, markup as PDF, print, copy, or share the file. Also, if you would like to rename the file, you can use the Edit option to make the changes or add more pages, change the filter, rotate, and crop the files.

Apple Notes app scanning tool works well, irrespective of the size of a document.