Last updated on August 2nd, 2024 at 11:07 am
I never try to install a new OS version unless I have my devices fully backed up. That at the very least, makes sure all my valuable files or stuff I cherish most like my photos and videos, are saved to a second location. So, knowing how to back up an iPhone can make all the difference between losing my entire data or keeping it safe just in case I want to replace it with a new model out of temptation or if it is ever lost or stolen. Most importantly, I won’t have to start from scratch while prepping for a new version of iOS.
How to back up an iPhone easily?
Apple offers me 2 main ways of backing up my data that I’ll be walking you through in a while from now.
- Use my iCloud account (cloud-based backup)
- Back up to my Mac (local backup)
Unlike cloud-based backups that keep my data offsite on a remote server, desktop-based backups like storing data on my Mac allow me to create a local backup. It is convenient for folks who don’t have a lot of data to back up. However, I find cloud-based backups more useful as it gives me the ability to access my backups from anywhere. Plus, it’s a great option if you have a lot of data to back up.
1] Back up iPhone using iCloud
Once the iCloud Backup is active on my iPhone, it will automatically back up when put on charging and connected to Wi-Fi with the screen locked. I just make sure to review what I have iCloud backing up for me and toggle off the options I find unnecessary for backup.
To begin, go to Settings, and choose [your name].
Then, scroll down to the iCloud tab and tap to expand it.
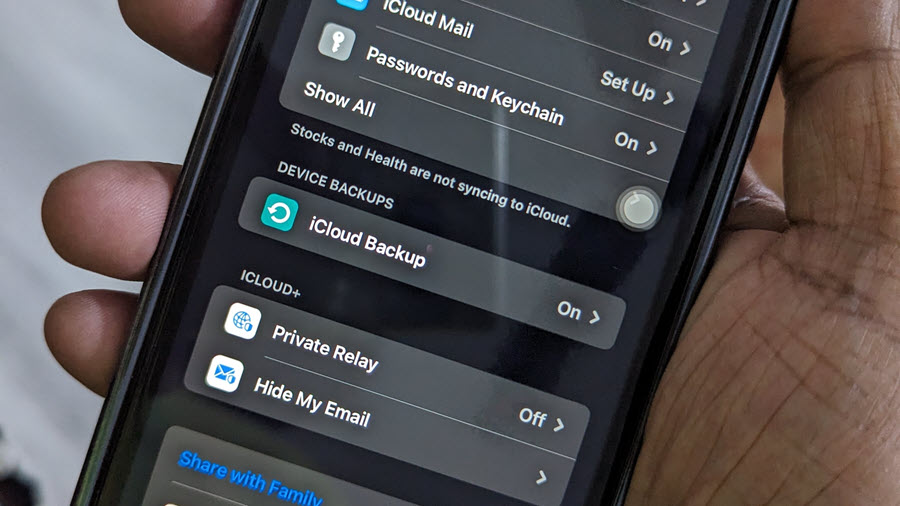
Locate the Device Backups section. Under it, you should find the iCloud Backup section. Turn on iCloud Backup.
To perform a manual backup, tap the Back Up Now button. Don’t forget to watch over your iCloud Storage. If you are running out of space, go for a paid plan. It starts from 50GB for little less than a dollar per month and goes up to up to 2TB for $9.99 permonth. I find this is necessary as Apple doles out just 5 GB for free and that doesn’t go far.

Note the exact time and date your phone was backed up. So, when you choose to restore your iPhone via iCloud backup, you’ll be shown a list of the last few backups and naturally, you’ll choose the one you have details of.

Note: For iPhone models supporting 5G technology, some carriers do offer the option to ‘back up iPhone via cellular’ network.
Restoring your iPhone backup from iCloud is an easy enough process. All you must do is sign into your Apple ID, and look for the prompt that reads Restore From iCloud Backup. It becomes visible as soon as you connect your iPhone to a WiFi network. Just follow the on-screen instructions from there to restore your iPhone successfully.
2] Back up iPhone to MacBook via Finder
Admittedly, what I found best about backing up my iPhone to MacBook via Finder is that It doesn’t make me pay Apple for additional iCloud space although I should make sure that have enough storage space on my MacBook.
Plug your iPhone into your Mac computer with the Lightning to USB cable. When prompted, choose Trust This Computer.
Open the Finder window or if you have it pinned to your Dock, click to open it.
Look for your iPhone on the left sidebar. Click to expand its view. Switch to the General tab at the top of the Finder window and scroll down to the Backup section.

Check the ‘Back up all of the data on your iPhone to this Mac’ option under the Backup section.

If you’re going to want to encrypt your backup for increased security, check the Encrypt local backup and create a password for the same. Don’t lose this password at any cost or else, you’re going to lose access to your data.
Once the encryption is configured, the backup should start automatically. Alternatively, click on Back Up Now to start it instantly.
You can check the status of your backup in the sidebar. Click the eject button next to your iPhone before unplugging it.
To restore your backup, revisit the Backup section of the Finder window and hit the Restore Backup button.

This appears to be the fastest way to restore data, though you may only find it if you have a lot of data to move to your iPhone. Still, it will make you run through the standard “Hello” screen on your iPhone, then following a few prompts to complete the setup process.