You can avoid unwanted interactions or refuse to become a part of some irrelevant posts and promotional events by turning off tagging on Instagram. The function makes it easier for a user to make themselves nearly invisible to other users on the app. Let’s see how to do it.
How to disable tagging on Instagram from unwanted people
Although tagging on Instagram influences brand engagement positively and helps you grow your following, it can quickly become a nuisance when unknown people tag you. This occurs because the default settings in Instagram allow anyone to tag you on their posts. You can restrict this behavior and stop people you are not familiar with from approaching you by disabling Instagram tag settings.
Launch the Instagram app. Click the Profile icon and then choose the Menu option (visible as 3 horizontal bars). Select Settings and, when directed to a new screen, scroll down to the Privacy settings.
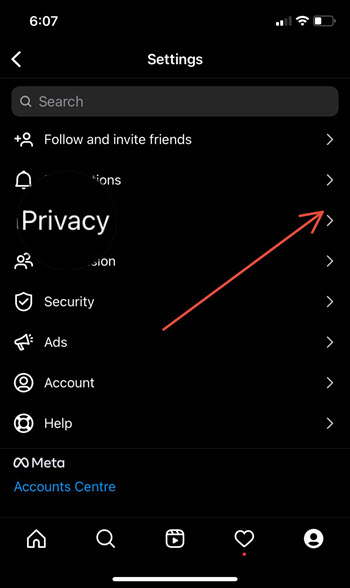
Under the Privacy screen, scroll down to the Interactions section. Expand the Posts heading by tapping the side arrow next to it.
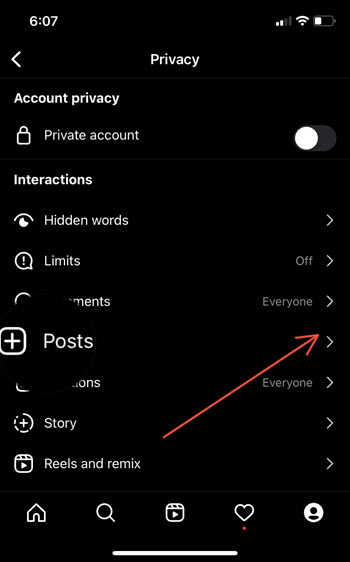
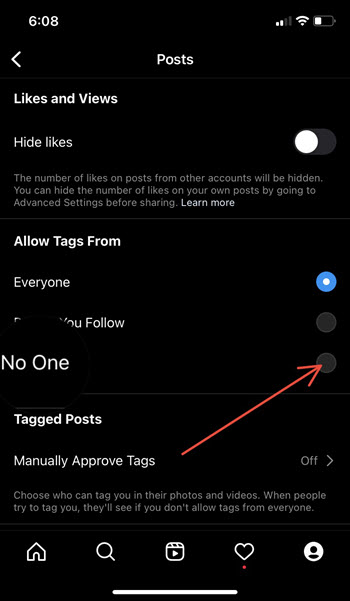
The Posts settings allow you to limit how others interact with your Instagram account. Go to the Allow tags from category and to stop people from tagging you, check the No one option. By default, Instagram has it set to Everyone.
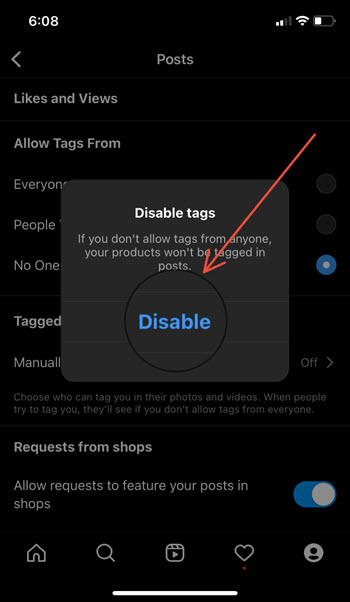
When prompted with a message, tap the Disable option. When you choose to disable tags, your products won’t be tagged in posts. So, if you would like to undo this action, simply hit the Cancel button to return to the original settings.
Tags in Instagram work just like the Facebook tagging feature. It identifies you in a post, photo, or status update that someone else shares publicly by mentioning your name. If you don’t like it, you can disable it by following the instructions listed above.
Hope this helps!

