Last updated on November 14th, 2024 at 06:48 am
For a task like publishing on Instagram regularly, the most obvious way for me is to plan comprehensive coverage for the week(s) ahead and avoid gaps by scheduling the content beforehand. That way, even if I get caught up with some other things or my assignments get mixed up, I’ll still see my posts going live in time. The process works well, especially for influencers or someone who run an account that is tied to a business or brand. Let’s find out how to use this in-app scheduling tool to schedule Instagram posts in advance without having to use third-party apps or Creator Studio.
How to schedule Instagram Posts in advance?
Before I proceed further and start scheduling my Instagram posts, it is important to mention that the methods for doing so may vary depending on the type of Instagram account I have or run. Particularly, the method to schedule posts for Instagram business accounts is different from that of personal Instagram accounts. However, what makes the feature so interesting is I can choose to schedule posts, reels, or carousels directly in the app up to 75 days in advance. This is not only necessary for gaining new followers but also for maintaining or keeping the existing ones. Here’s some guidance on how to go about and use the feature to stay relevant as well as active on social media.
First, you’ll need to switch to the Professional account if you are using a personal account. Second, use Schedule content settings to schedule a post on Instagram.
Switching to Instagram Professional account
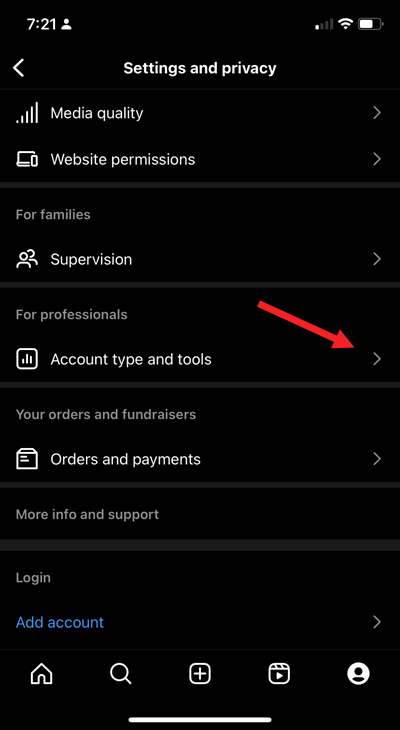
Go to Settings and privacy and expand the Account types and tools entry under the For professionals heading.
Tap the Switch to professional account entry.
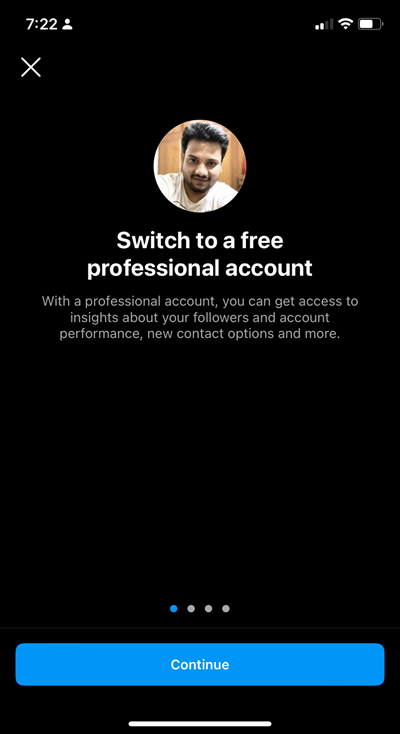
Hit the Continue button and follow the on-screen instructions to complete the setup.
Configuring Schedule content settings to schedule a post on Instagram
Go to the profile icon at the bottom of the app screen and tap the Hamburger menu visible in the upper-right corner.
Choose the Scheduled content entry.
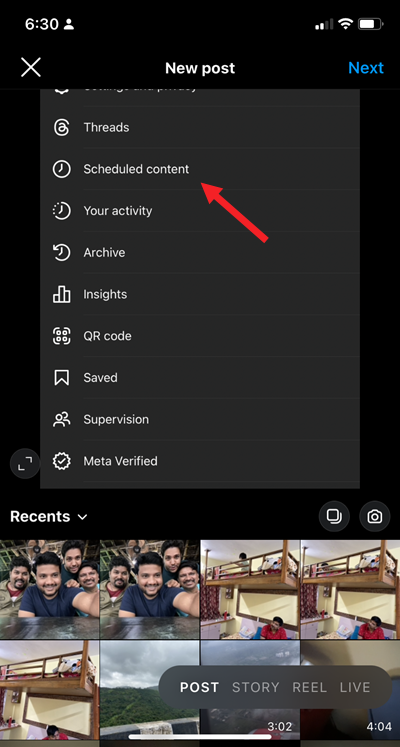
When directed to a new screen, hit the Schedule now link. Tap the Post, Story or Reel option.
Select the Music icon at the top of the screen to add music to your Instagram Story or Reel. Make the necessary edits, if required.
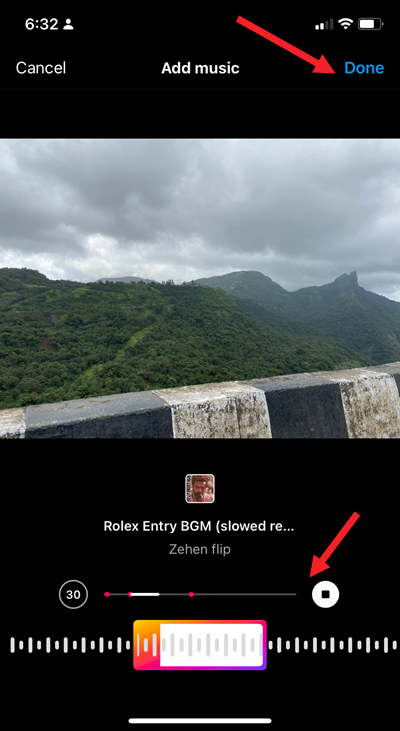
Hit the Next button to proceed further.
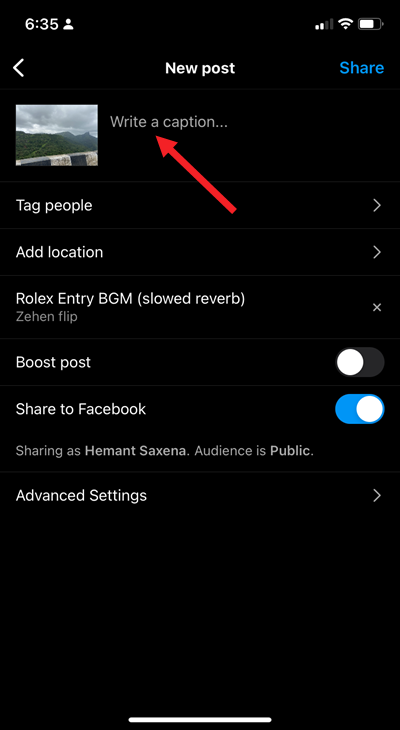
Add a Caption for the post. Then, under the New post screen, expand the Advanced Settings setting.
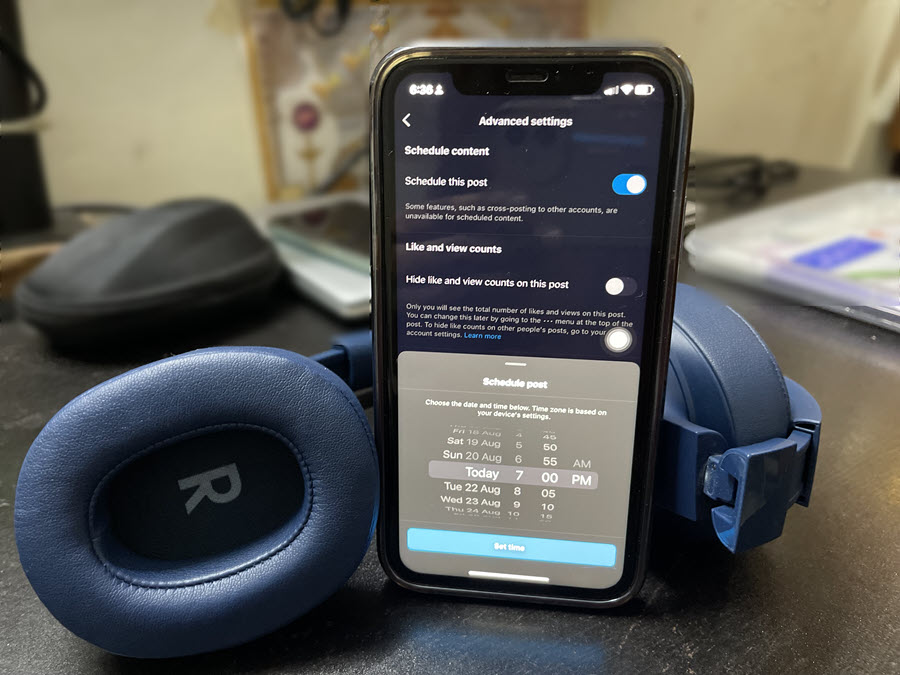
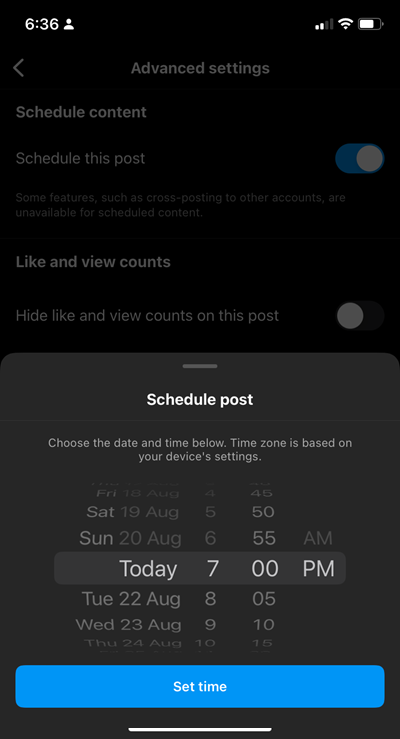
Under the Schedule content heading, toggle On the Schedule this post switch.
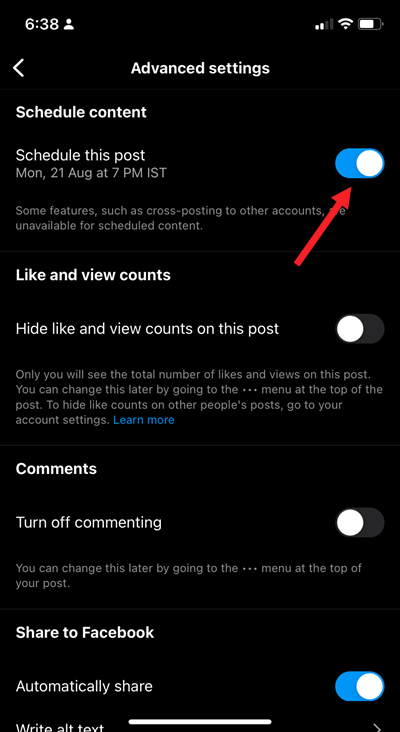
Instantly, the Schedule post window should pop up allowing you to choose a date and time. The timezone will be based on your device’s settings. Currently, cross-posting to other accounts is not supported for this feature.
Now, even when you’re not around to publish each post yourself, all your scheduled posts will be published on the specified date and time.
In addition, you’ll also see achievements, relating to taking specific action when creating a Reel or a Story/Post. This occurs when a creator has successfully managed to unlock achievement after they have published their content and can click on the View option in the Notification section to see more information.
Platforms like YouTube already offer tools that allow creators to schedule live streams in advance. When done, the content shows up in the subscribers’ feed as upcoming. Viewers can then set reminders to get a notification when the stream is about to begin. Similarly, TikTok rolled out Video Scheduler, a new feature that lets creators on its platform and Business Accounts to schedule a post up to 10 days in advance.

