For netizens like me who primarily promote events online, Facebook is a great place. Through it, I can quickly spread the word about upcoming events I am planning to organize and stand a chance to connect with a wide audience. Yet, for someone who hasn’t tried this before, creating an event on Facebook can be challenging. To assist them, I’ve come up with this simple guide, a digital solution I think could help them grow their guest list and make their events a success or take relationship-building experience to the next level. Let’s see how to create an event on Facebook.
How to create an event on Facebook?
With Facebook, two types of events can be created, based on your specific purpose:
- An online event or
- An in-person event
As the name suggests, online events enable followers to gather virtually whereas in-person events are location-based events like a party or a gathering to meet members of your audience in person. Let’s explore how to create both types of events.
Creating a Facebook online event:
Go to the Facebook website on a web browser or log into your mobile app. Tap the Menu at the bottom of the screen and select the Events tab.
Hit the + button at the top of the Events screen to create a new event.
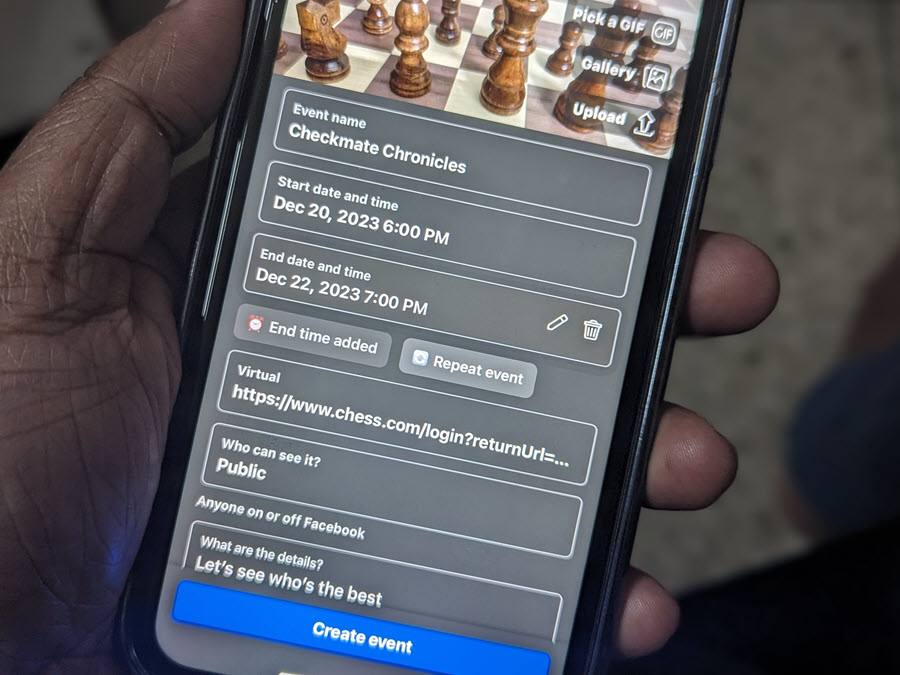
Upload a cover photo from your camera roll or pick an image from the Facebook gallery. You can also add an image in a GIF format. Organizing a small chess tournament, I found it appropriate to use a chessboard picture that aligns with the event’s purpose.
Give the Event a suitable name as I’ve done – ‘Checkmate chronicles’.
Add the Start date and time. Then, add the End date and time.
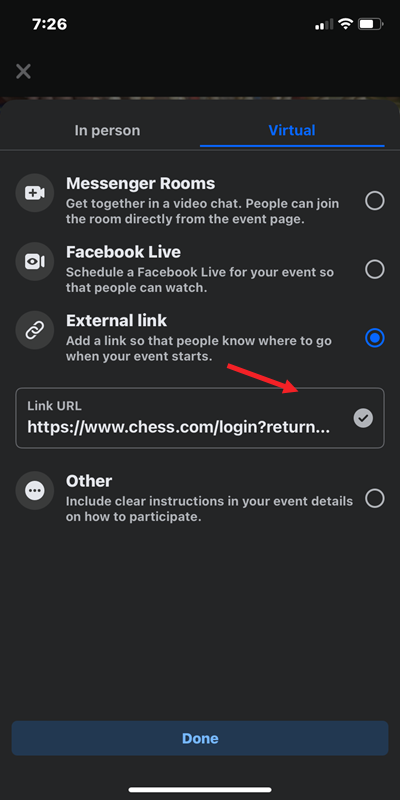
Decide if it’s going to be a Virtual or in-person event. Since we are creating a virtual event choose the desired option. Then pick one of the options to host the event. You can select Messenger Rooms to get together in a video chat or join the room directly from the event page.
Alternatively, you can schedule a Facebook Live for people to watch or add a link through an External link so people know where to go when the event starts. I selected this option to direct the members to the online event.
Set the visibility to Public or Private.
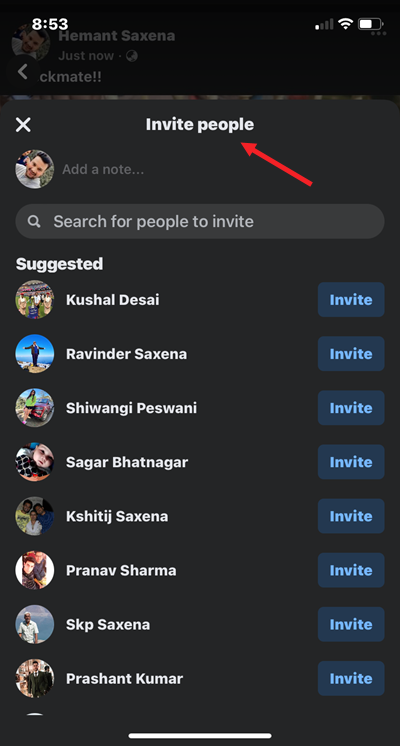
Now that the prerequisites of your event are set up, begin inviting guests. Hit the Invite button next to the member’s name under the Suggested list. From the homepage, click Events in the sidebar menu on the left.
Hit the Share button when done.
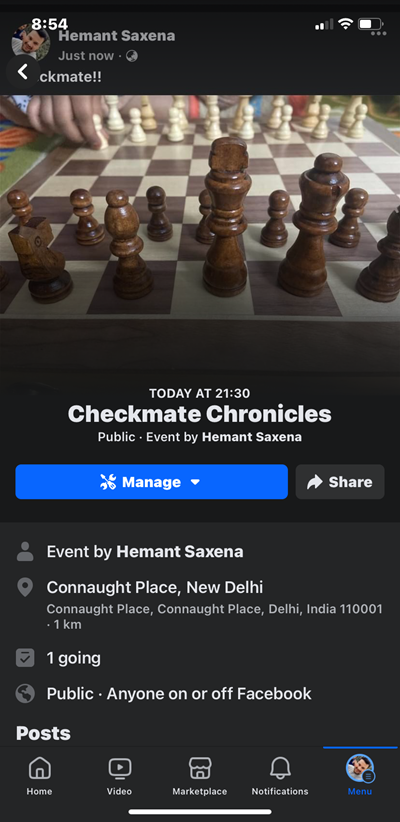
Send Invites from the Suggested list. You can configure additional settings like holding for review posts and comments that are detected as spam.
Hit the Share button to post an event or create an event on Facebook.
A friendly tip
Just creating a Facebook event doesn’t guarantee a growing guest list. So, get the word out and engage your community about your event by promoting it through Instagram or Facebook Story or posting about it in a related group.

