A cinematic sound experience greatly improves the audio experience for everyone, and a Netflix premium plan upgrade is all it takes to experience it on your device that has stereo speakers. It doesn’t matter whether they are Dolby Atmos-capable or not, the Netflix Spatialise Stereo option takes care of it. We’ve put together a guide to help you enable it on your iPhone or iPad. If you remember, A built-in Spatial mode already exists in Airpods pro.
How to enable Netflix Spatialise Stereo mode on your iPhone or iPad?
Netflix Spatialise Stereo mode offers a sort of simulated surround sound without requiring a home theater setup. The result you get is the highest quality sound experience available, whether you’re watching at home on TV or a computer, or on the go with the iPhone or iPad. Initially, the new shiny audio option was only available on some of Netflix’s original titles. The streaming service, however, has now made it available for over 700 titles on its platform.
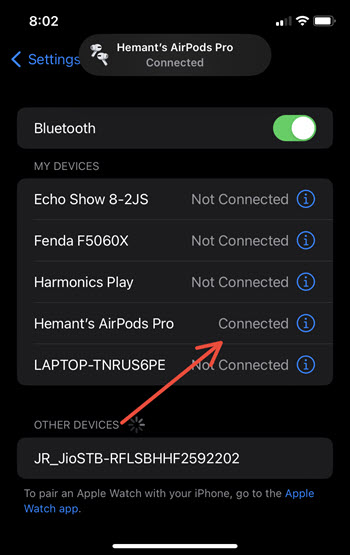
AirPods connect to your iPhone or iPad instantaneously. Alternatively, you can connect them through Settings.
Launch the Netflix app. Switch to the Home tab and select a movie or a show you want to play. Once it starts playing, launch the Control Center by swiping your finger down from the top-right corner of your mobile screen. Long-press the volume slider.
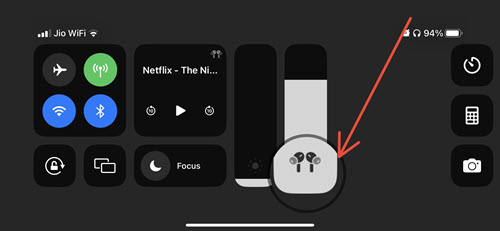
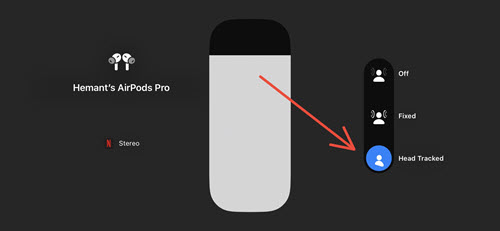
Now, press and hold the volume slider to go to the volume settings screen. Tap the Spatialise Stereo icon located in the corner of your screen. Once done, exit the Control Center and resume your playback.
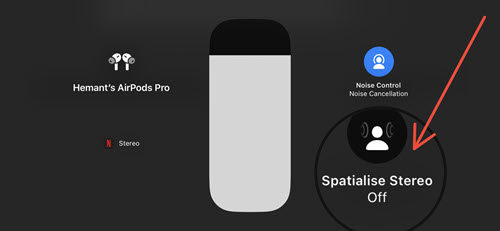
For a more immersive sound experience, enable the Head Tracked option by gently tapping it.
Does Spatial Audio work with all videos?
To find out which titles include support, simply enter “spatial audio” into the Netflix search bar or look for the spatial audio badge on the title card of the shows and movies. The good thing is you don’t need any additional equipment to get it to work.
Hope that makes sense!


